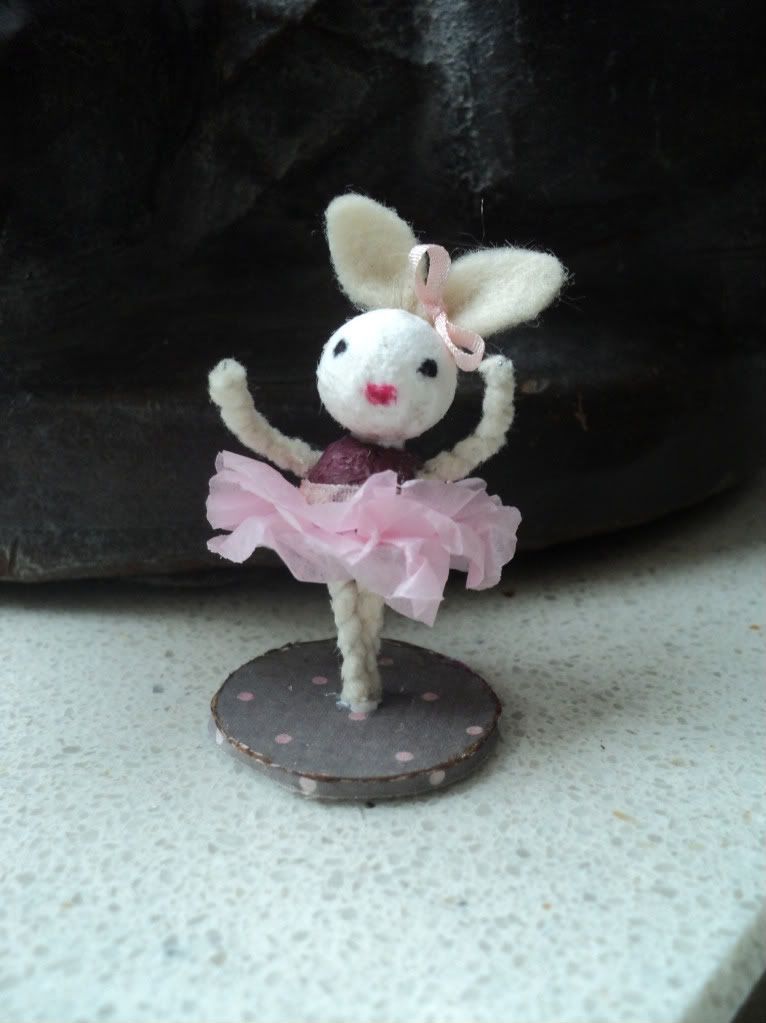
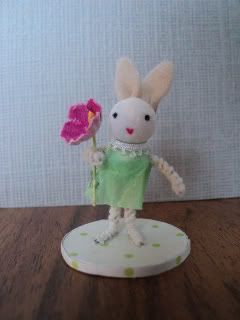
Dancing on tiptoes...a cute little bunny for you to make.
So let's grab the materials and put this little ballerina on her feet, it's an easy project and so adorable when finished. Who knows..maybe this bunny will lighten up your coming Easter.

Materials needed:
Two pressed cotton balls (1 cm diameter)
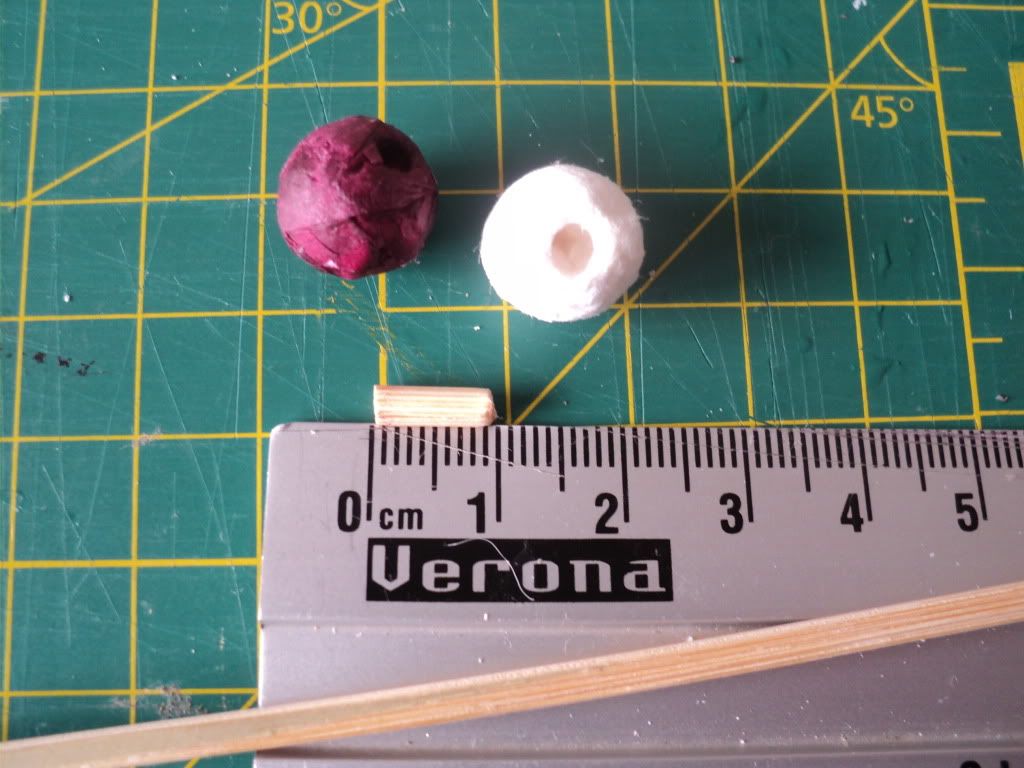
A chenille stick
A round toothpick
Scraps of paper for the dress (I used two colors tissue paper)
A tiny piece of felt for the ears
Markers, black and pink
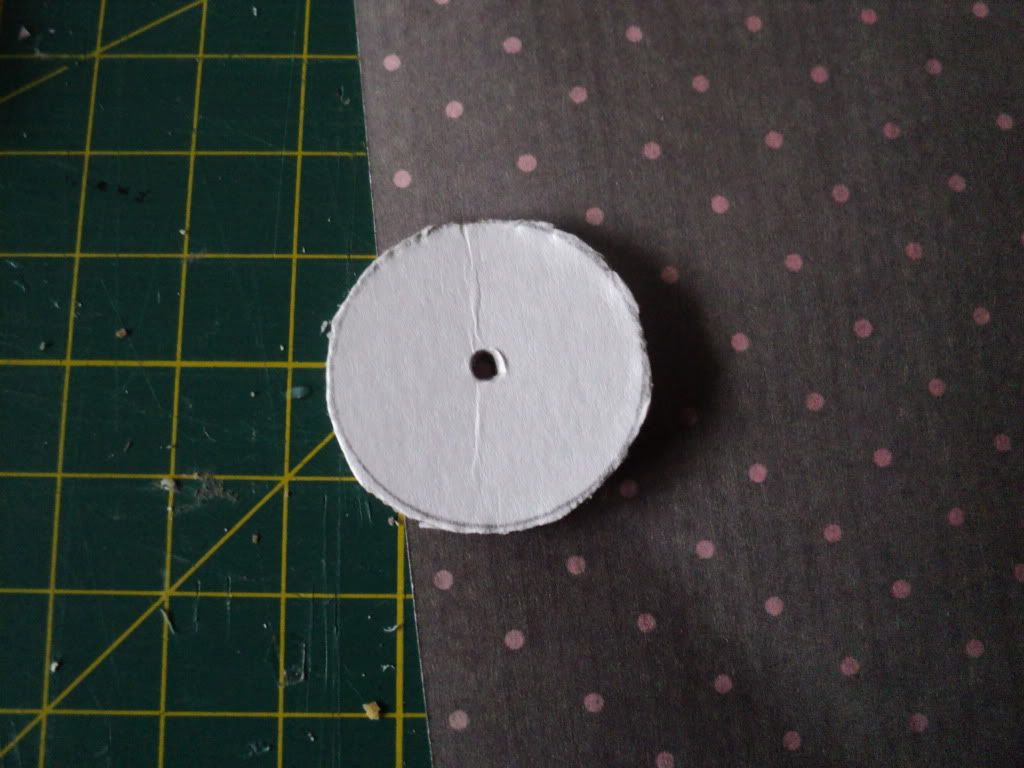
A circle cut out of cardboard
Pretty paper to cover the cardboard circle
Glue
Scissors
Step 1 - Let's do some bodywrapping
Cover one of the cotton balls with the paper of your choice. This ball is going to be the body of our ballerina. Cut a wide enough circle out of the paper to cover the whole ball. Glue the paper onto the cotton ball untill it is covered. On one side there's a hole in the cotton ball, make sure to keep that hole usuable, don't cover it up.

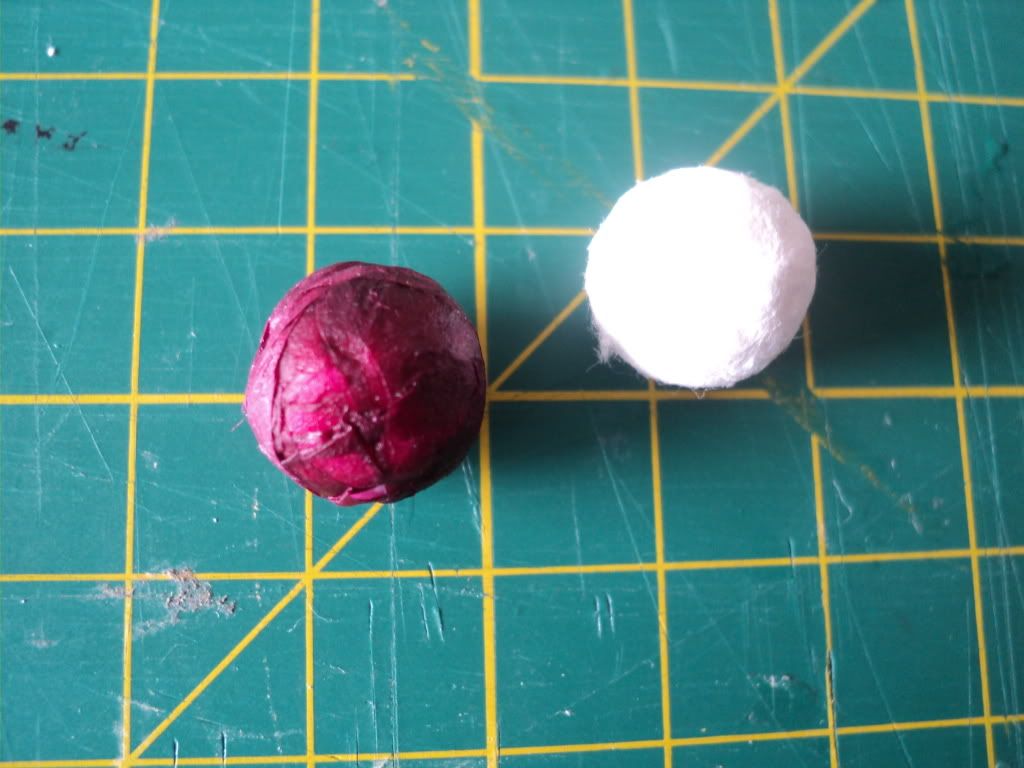
Set aside to dry.
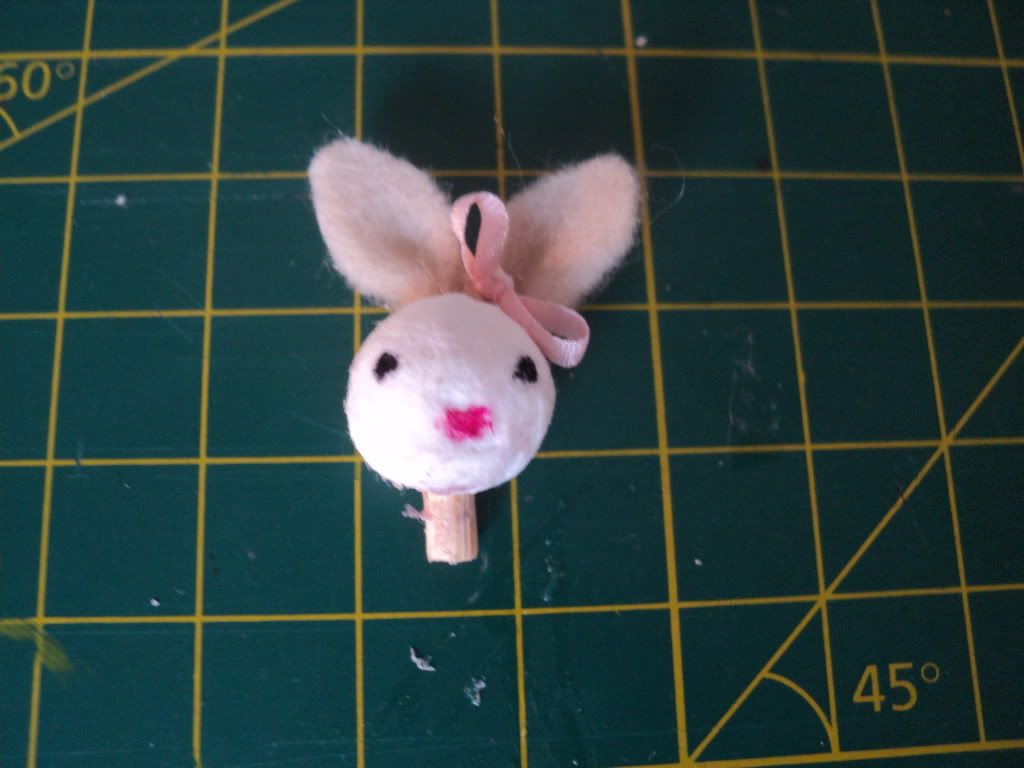
Step 2 - I like a firm head
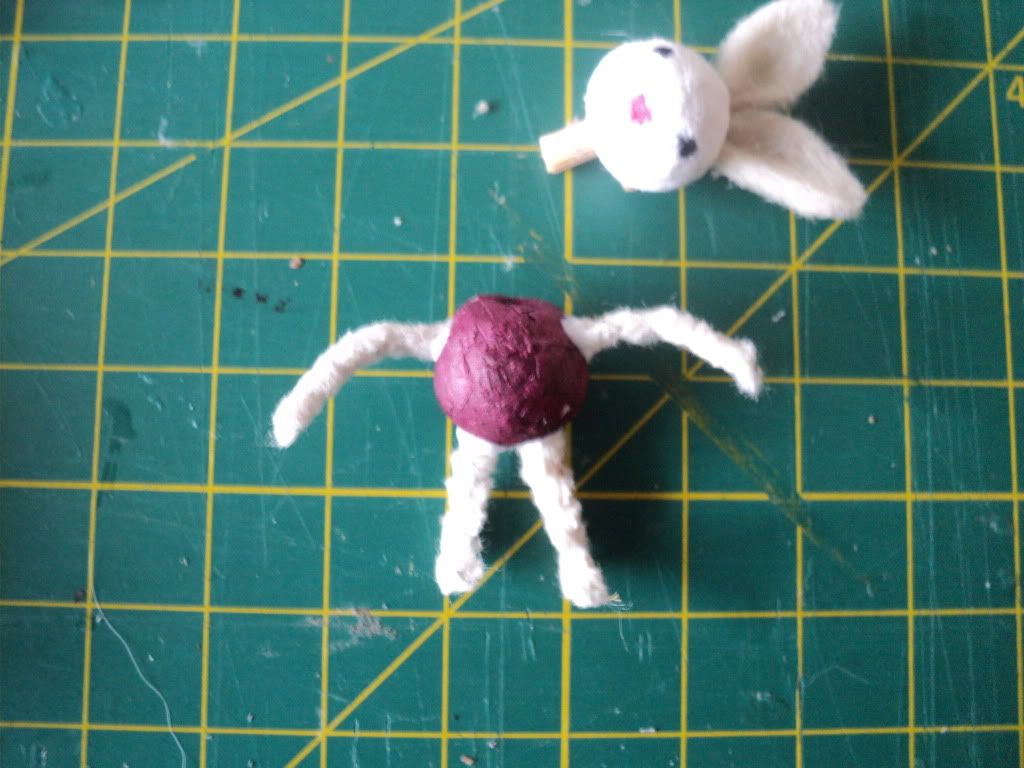
Cut a small piece from the toothpick, the length should be just enough to attach the head to the body of the bunny. I needed 1 cm in this case. Glue the piece of wood into the hole of head.
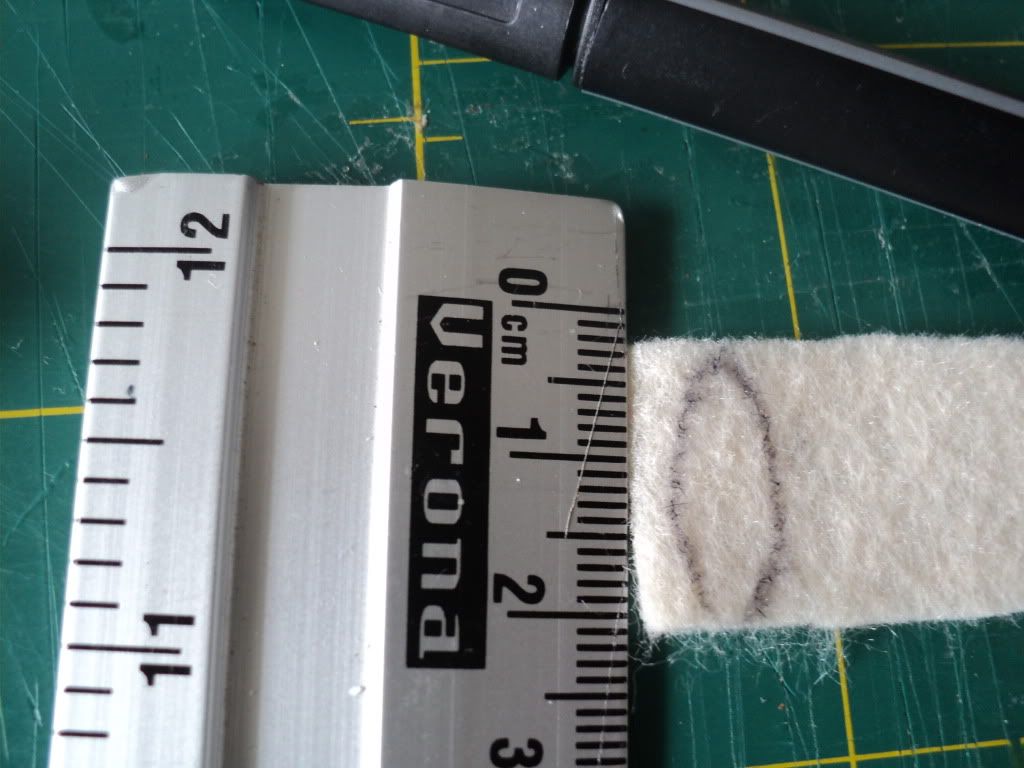
Step 2 - To hear I need an ear...or two
Cut two little ears out of the felt. Have a look at the picture to see the shape.
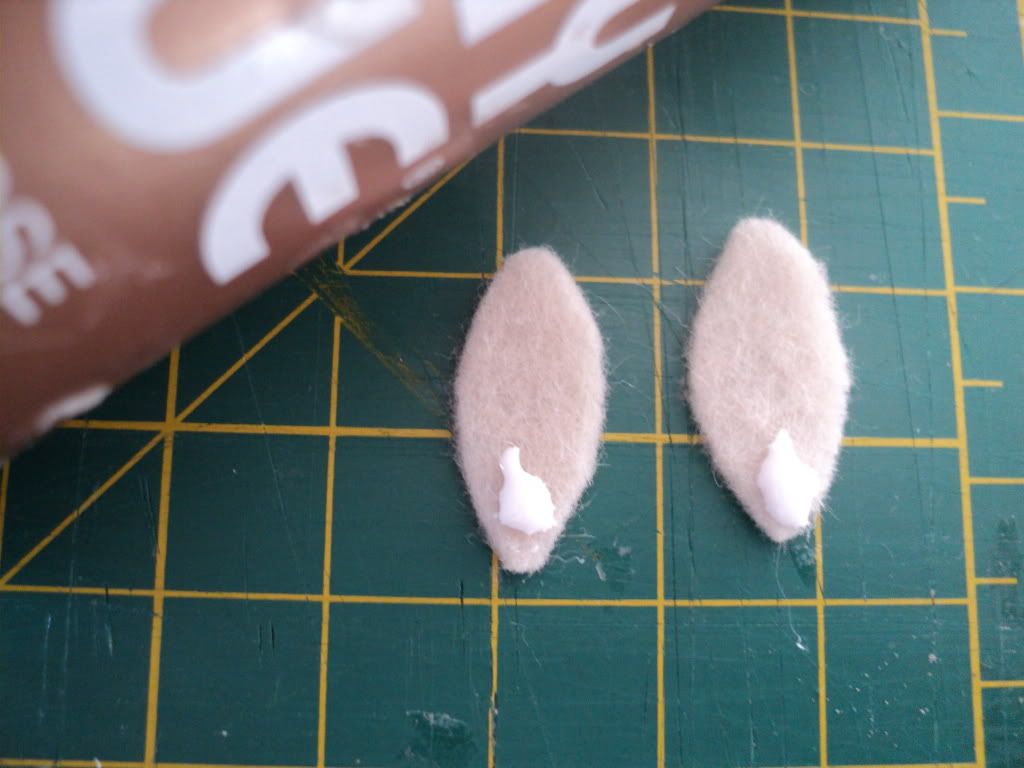
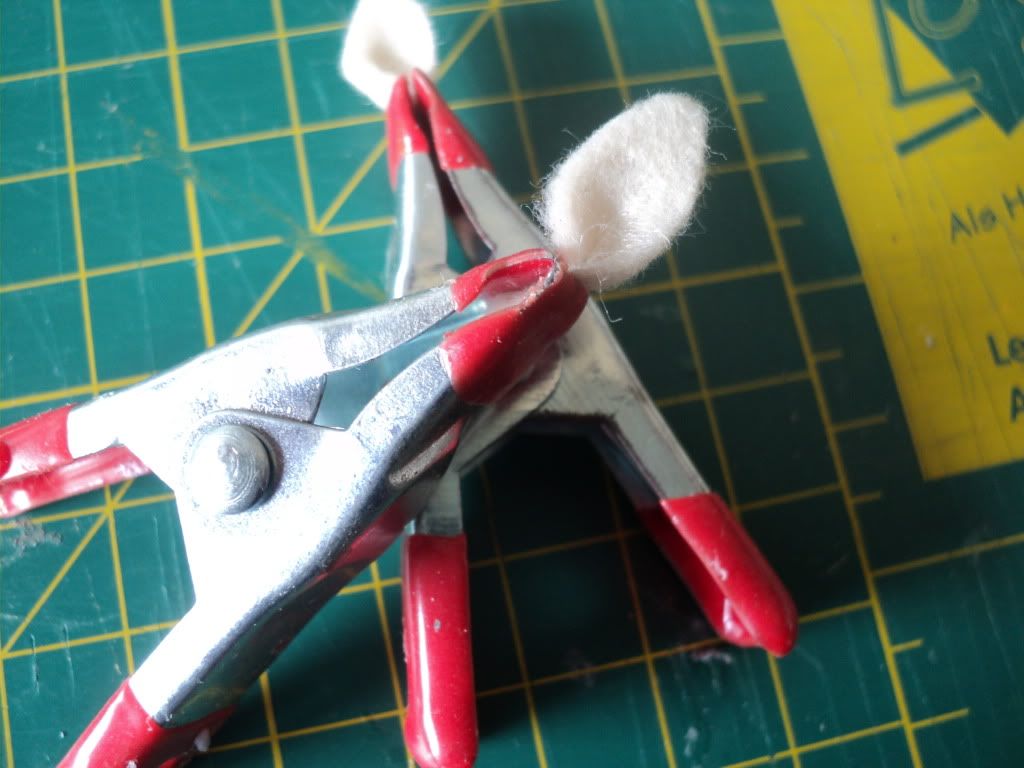
Put a tiny blob of glue on the bottom of an ear. Glue the sides of the ear together.Take care only to glue the bottom half and leave the top ear as it is. Use a clip to secure and set aside to dry.
When the ears are dry glue them to the backside of the head. Trim the glued end if needed.
 |
| Position of the ears at the backside of the head |
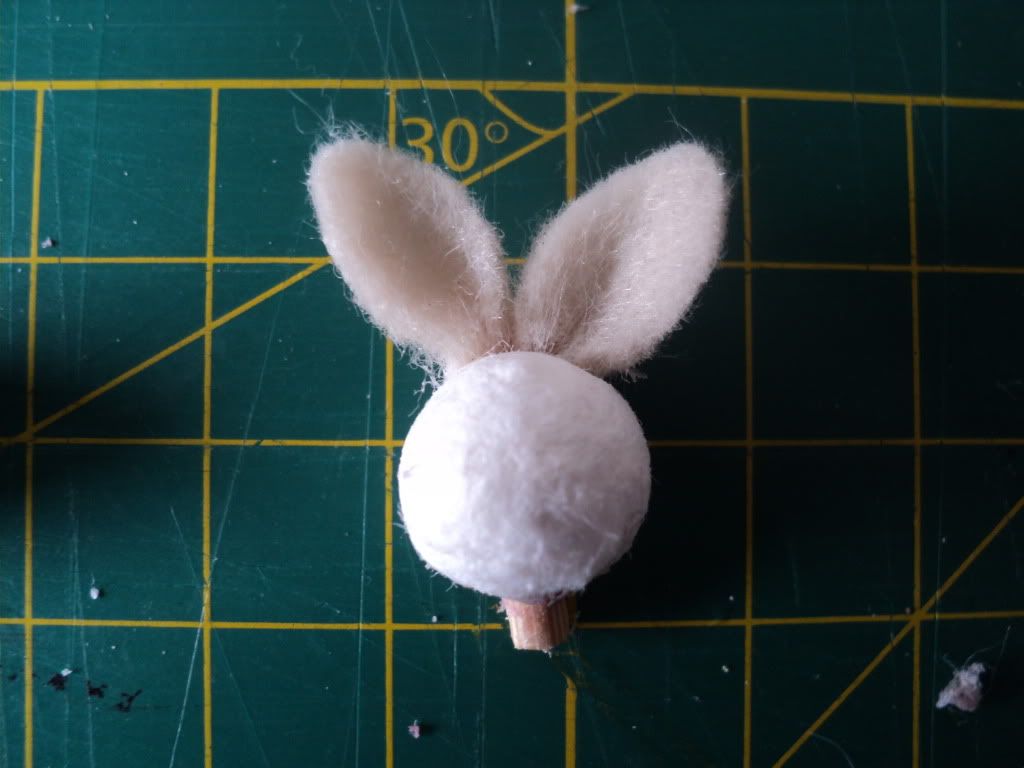
This is how the head looks from the front side
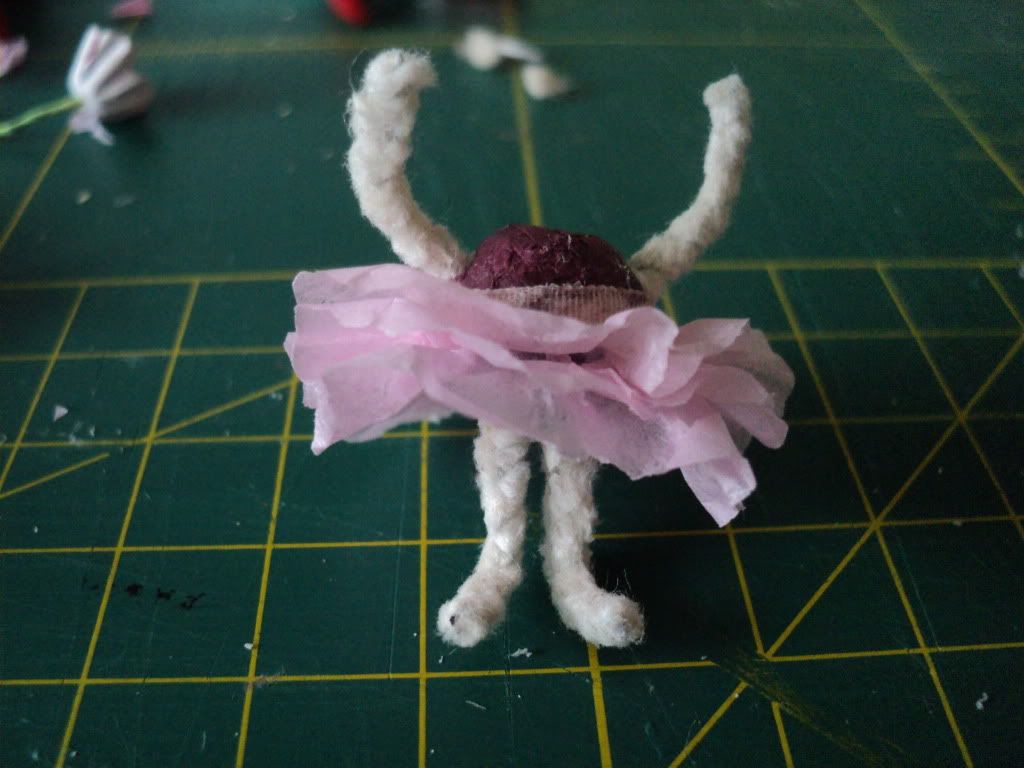
Step 3 - Put your left leg out, put your right arm in
Cut 4 pieces of chenille stick into 2 cm parts. Two will be the arms, the other two the legs. Poke with a craft pick two holes on the side of the body and two on the bottom. Put a tiny amount of glue on one end of the chenille sticks and insert the sticks in the holes. Allow to dry.


Step 4 - I spy with my little eye
Take the markers and draw the two eyes with black and the mouth with pink. Since the cotton ball will absorb the ink quickly don't put to much pressure on your maker. If needed you can mark the position of the eyes and mouth first with a crayon and when satisfied use the marker.

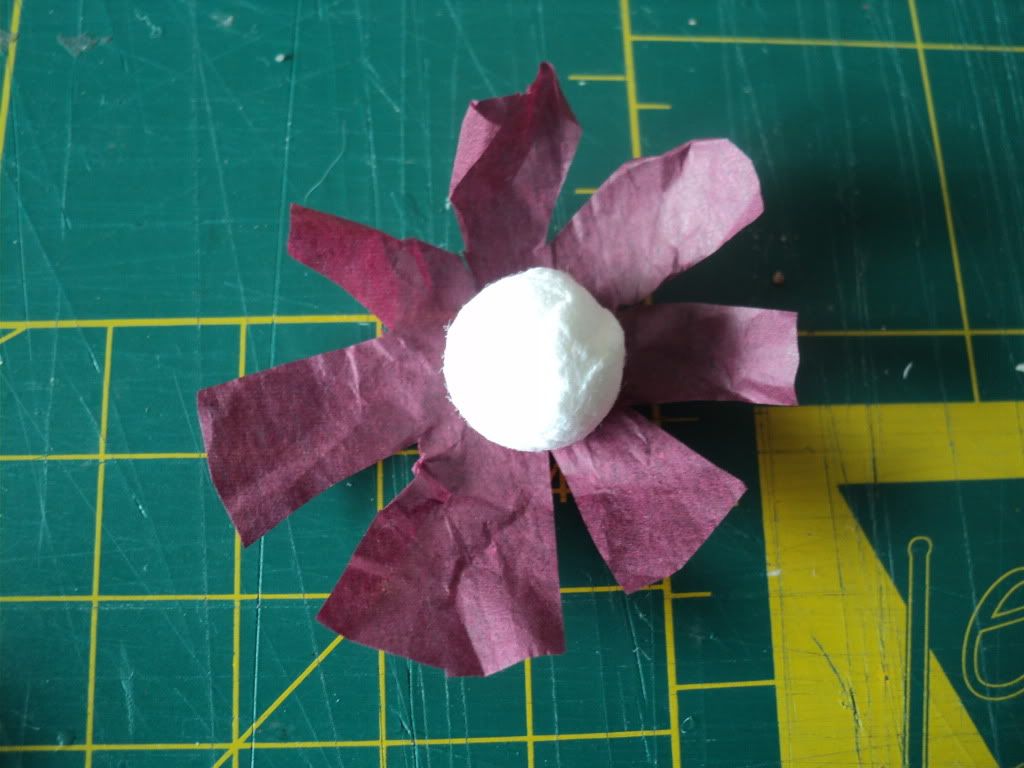
Step 5 - The dress makes the bunny
The tutu is made out of three layers of tissue paper. For each layer take a piece of paper and fold in half, fold in half again.

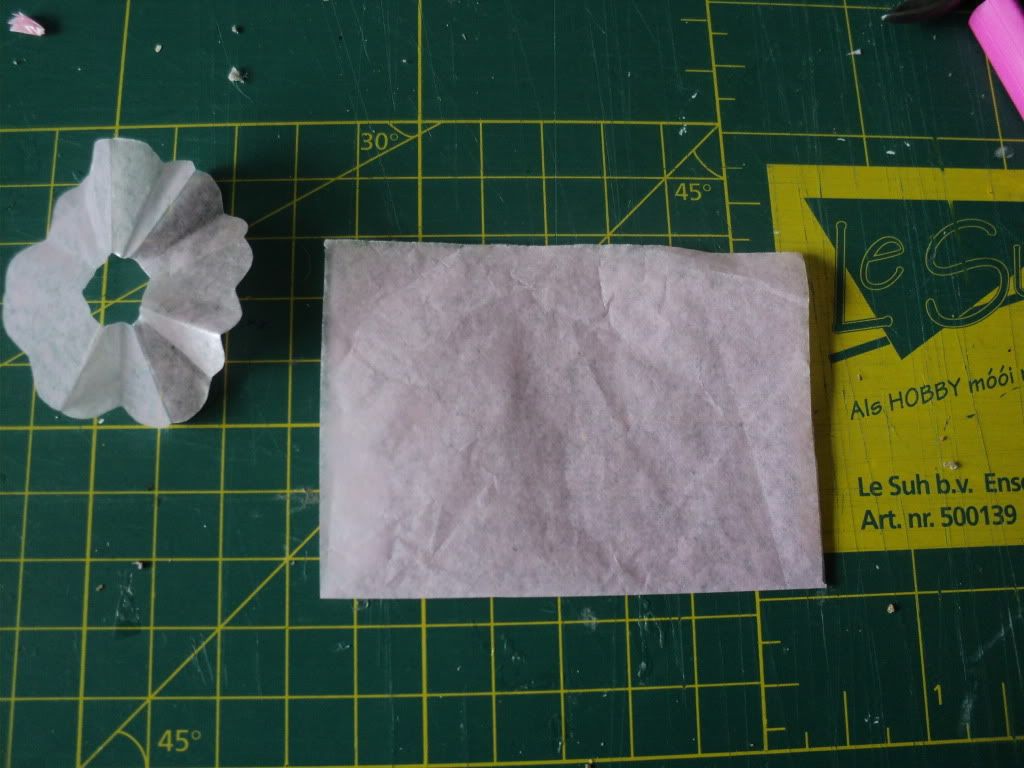
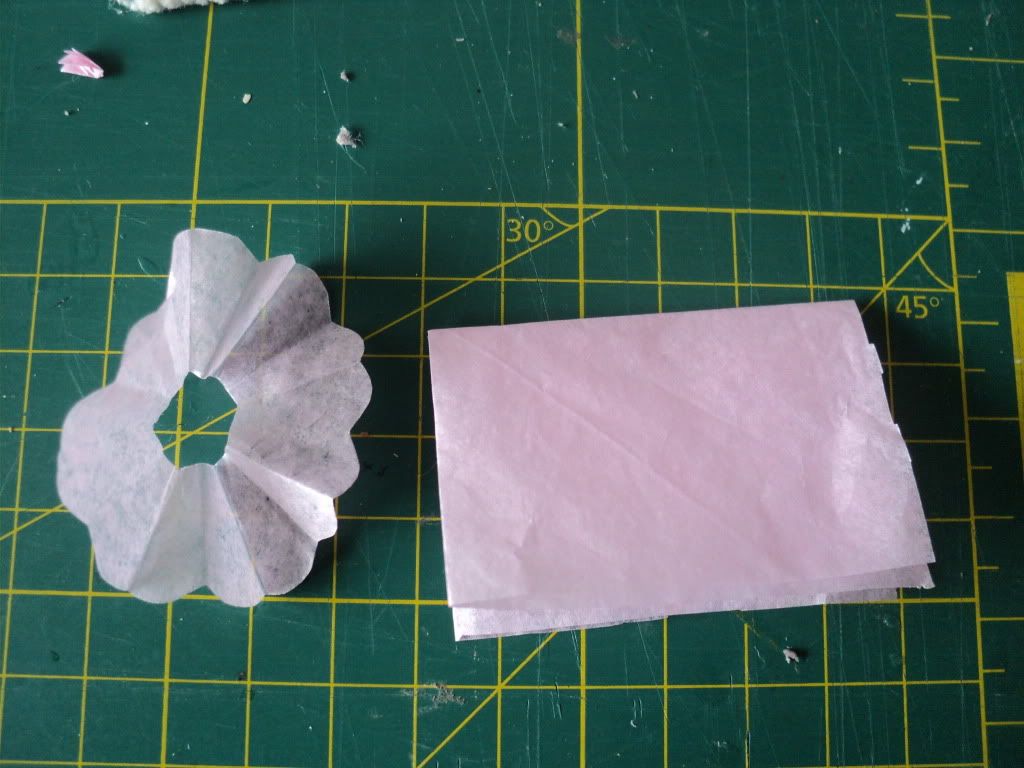
Take the upper right corner and fold it down, you'll have a triangle shape
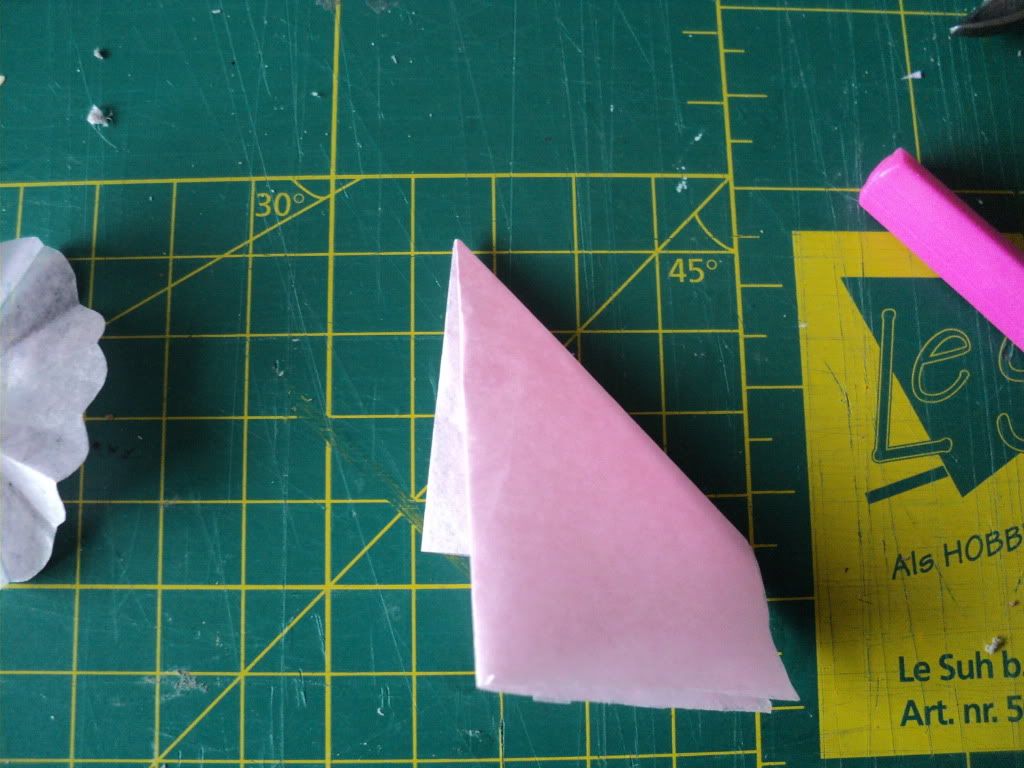
Fold again in the same manner

Take the scissors and cut the top point off
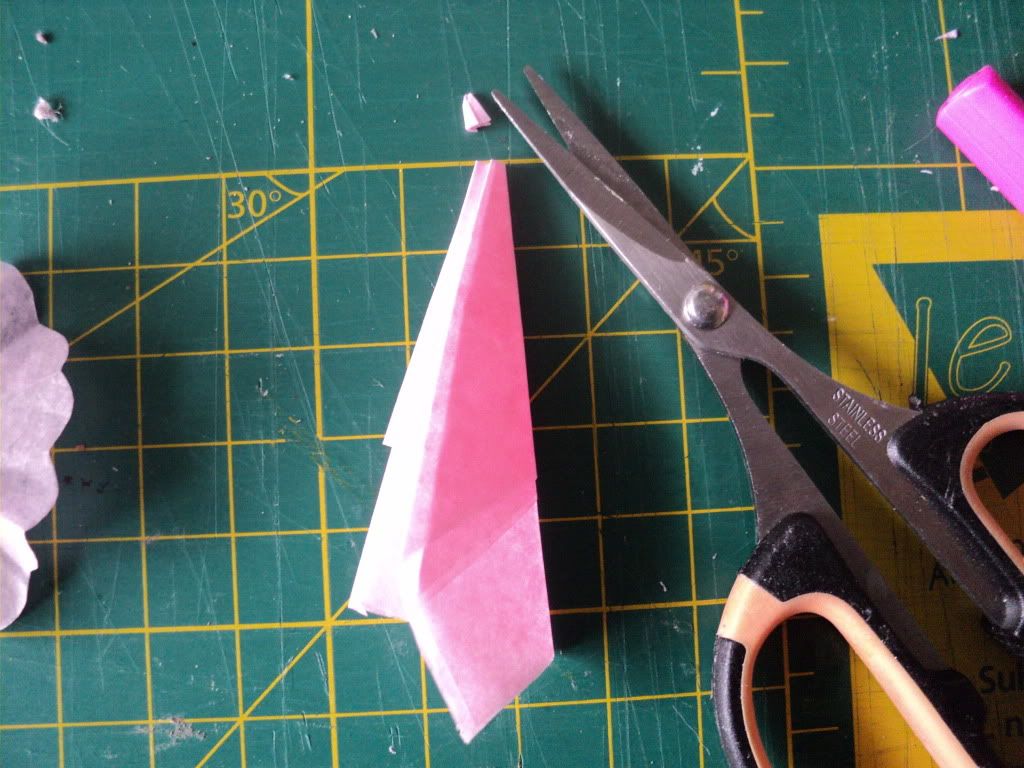
Cut the lower part into a roundish shape

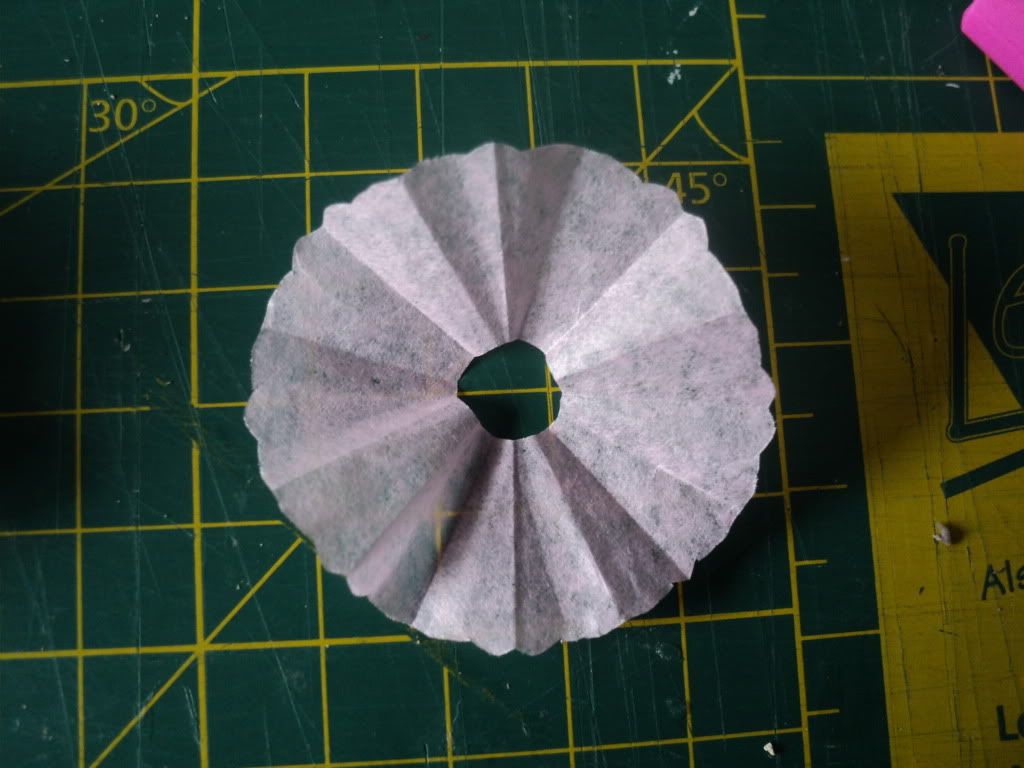
The completed skirt
Cut three skirts and glue them to the body. Use a tiny amount glue.
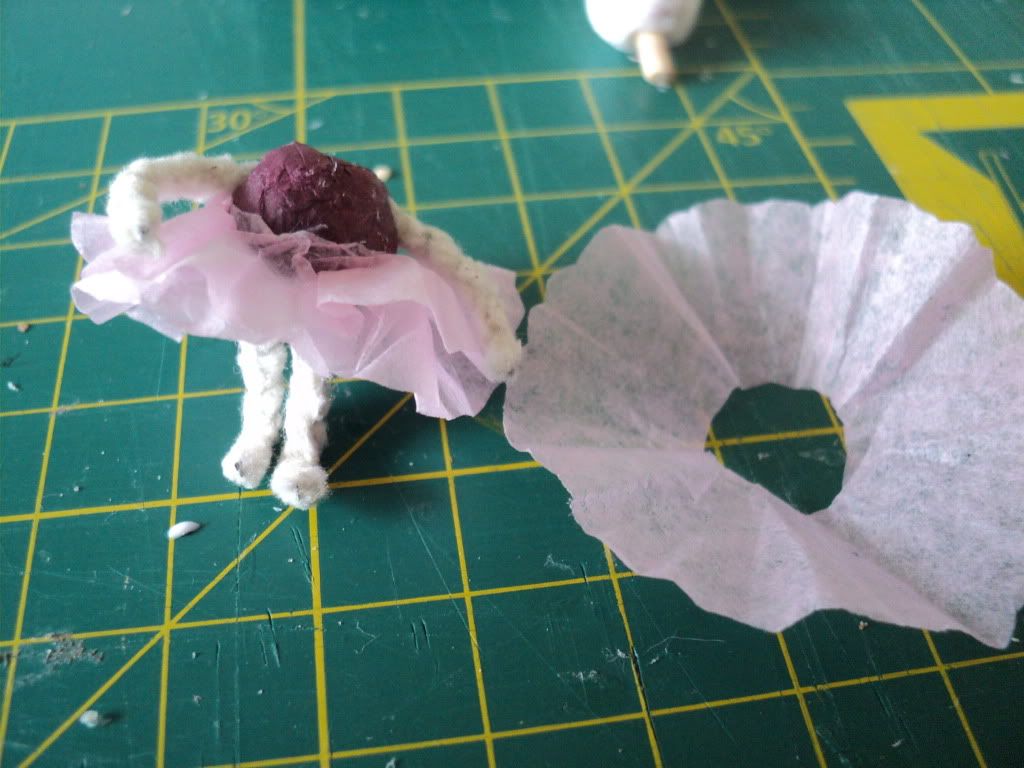
So far...so good. It should look something like this:
Step 6 - Standing firm
Cut a circle out of cardboard and poke a hole in the middle. Cover the circle with a pretty paper. When dry, glue the feet of the ballerina into the hole.

Step 7 - The grand finale
I like bows so bunny had to have one too!
And...glue the neck into the hole of the body. We're done!
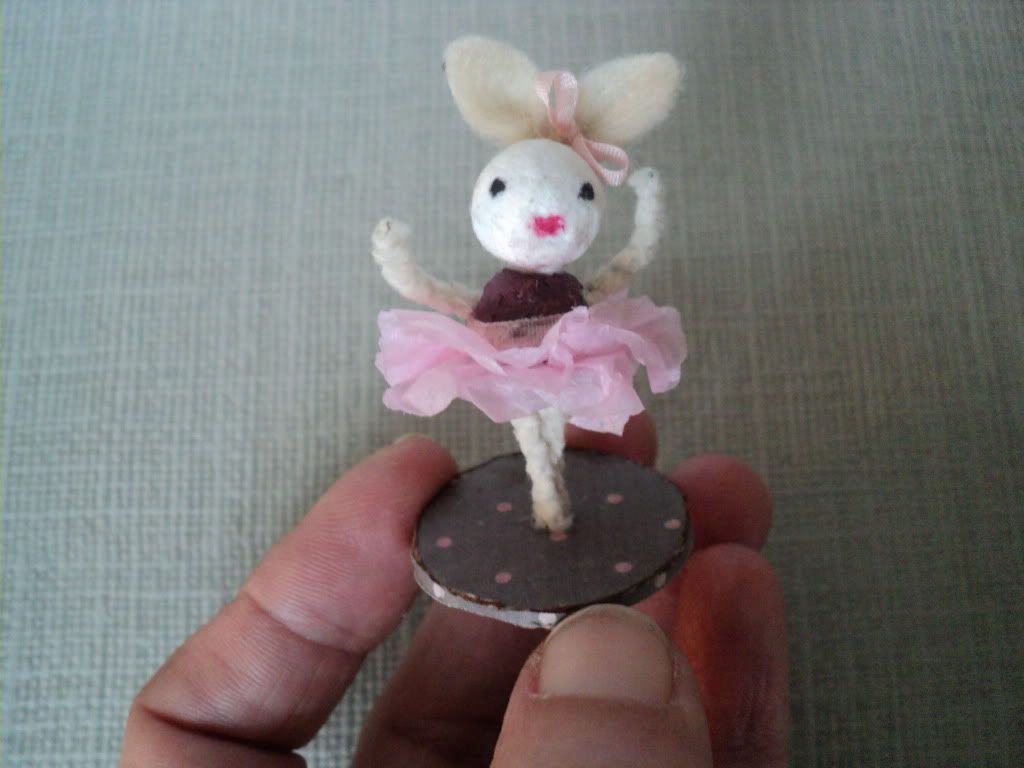
I hope you like this tutorial, if you have any questions don't hesitate to ask. Have fun!
Here's another bunny I made.

Bella Ballerina and Fluffy Flower together. Aren't they cute? Oh dear....making bunnies is becoming addictive!


Thank you for this very cute tutorial. I had fun just reading it.
BeantwoordenVerwijderenHugs
Very cute!
BeantwoordenVerwijderenGeneviève
Oooh wat een schatje, bedankt voor deze tutorial, die ga ik zeker eens proberen.
BeantwoordenVerwijderenBeautiful bunnies. Thank you for the tutorial.
BeantwoordenVerwijderenHugs Maria
Son preciosos, gracias por el tutorial.
BeantwoordenVerwijderenThanks. It's a very fun tutorial. Bella Ballerina aand Fluffy Flower are very nice.
BeantwoordenVerwijderenBye Faby
Gracias por el tutorial, es una conejita muy bonita. Un saludo, Eva
BeantwoordenVerwijderenThis is so cute! What a great tutorial! xoxo,Amy
BeantwoordenVerwijderenOh,dios mio que lindos son !!
BeantwoordenVerwijderensobre todo la bailarina .
ojala me queden como a ti cuando lo intente hacer!!
Un millón de gracias por el tutorial Peggi !!
eres un amor !!
** . * . . . . * . * . Un besito
.. * . (\ *** /) * . * cielo
.* . * ( \(_)/ ) * * . que tengas
.* . * (_ /|\ _) . * . un buen
.* . * . /___\ * . . * dia