Posts tonen met het label Shabby Chic Petite. Alle posts tonen

vrijdag 8 april 2011

Heating up the place

I've joined another blog http://poppenhuiskladblogger.blogspot.com/ and since that one is merely in Dutch I'll be using English here. I haven't been blogging much lately but that doesn't mean I haven't been busy. I'll show you what I've been up to the following days.
 To my big surprise so many of you have entered the give-away...I'm stunned. What a great response! Tomorrow is the big day and I'm really wondering where the goodies will go to...maybe the gift has to travel across oceans, mountains and borders to get to it's destination!
Guess what? Already over 300 followers, I'll soon be having another give-away!!!!! Any suggestions on what you'd like to win are welcome!


Well...spring is in the air, the temperature is climbing slowly, we're turning off the central heating and we all have days of lingering in the sunshine on our minds. The perfect setting to create the following; a coalbox in miniature :o)

I made a box out of balsa wood with a removable lid at the front. After covering it with Gesso I painted it greyish and gave it a more used look.
Here you see the basic box:

I made tiny coal scoops out of the tinfoil of waxine light cups

After attaching a hook on the side of the box from which the scoop can hang, a knob on the front of the lid and a handle on top this is how the coalbox looks


The box is filled with tiny stones resembling coal

The living room is getting cozier and cozier...


See you all tomorrow, I can hardly wait!

vrijdag 11 maart 2011

Jumping for joy

Heb je dat ook wel eens dat je een gat in de lucht kan springen omdat mensen je zo blij maken?
Don't you sometimes just want to jump for joy because people make you happy?
Ten eerste jullie allemaal bedankt voor het volgen en de lieve berichtjes op het blog. Wat een prachtig welkom terug.
First a big thank you to all of you for following my blog and leaving such sweet comments here. It surely was a warm welcome back.

Ik ben druk bezig geweest, voldoende om een paar berichtjes op het blog te zetten. Maar met het volgende werd ik wel heel blij. Ik had een pakketje gekocht bij http://www.nalladris.com/ voor een kroonluchter. Ik had al eerder een kit bij deze webshop gekocht en het beviel me prima dus ik begon met veel plezier.
I've been real busy the last week so here's an update on what's been going on here. I purchased a kit for a chandelier at http://www.nalladris.com/. Since I've bought her kits before and was very pleased with them I started of with excitment to get this project done.

Eerst maar een alle prachtige Swarovski kralen en onderdeeltjes  in aparte bakjes doen zodat het geheel wat overzichtelijker wordt en daarna de beschrijving nauwkeurig volgen. Ik was lekker op weg, totdat...
After sorting  the beautiful Swarovski beads and findings  neatly I started following the instructions carefully. This was great fun, until...
... er tot mijn grote schrik één van de gesoldeerde bakjes van de basis afbrak. Een ramp, want ik kreeg met geen mogelijkheid het bakje weer terug op het ornament. Ik probeerde alle soorten lijm die ik in huis had uit maar zonder succes. Wat nu?
...to my horror one of the soldered caps broke off from the base. A true disaster because no matter what glue I used I was unable to put the parts back together again. What to do?

Ik stuurde een mailtje aan Sun (eigenares van de webshop) met de vraag of zij het onderdeel ook apart kon leveren. Ze stuurde gelijk antwoord terug dat ze wel iets kon regelen. En wat dacht je? De volgende dag bracht de postbode een nieuw exemplaar en dat alles zonder extra kosten! Daar word je toch ongelooflijk blij van, wat een service zeg!
I decided to email Sun (she owns the webshop) and asked if there was a possibility to obtain the part separately. She answered immediately that she could arrange something. To my big surprise the next day the mailman brought me the package with a replacement. And all of that without additinal charge! Now...isn't that something that just makes a person happy? What service!
Hoera,  de basis klaar (met nieuw ornamentje) en alles in de Gesso.
Hooray, the base is finished and covered with a coat of Gesso.
Geduldig kraaltjes rijgen en vastmaken.
Carefully threading beads and attaching to the base.

Ik ben een prachtige kroonluchter rijker.
I'm the proud owner of a beautiful chandelier.

Jammer dat je de glinstering niet zo goed kan vastleggen op de foto. De Swarovski kristallen heb ik in het grijs  besteld en dat maakt de lamp nog aparter. Trouwens, hij werkt echt!
I'm unable to catch the glitter of the Swarovksi crystals on a picture but I assure you it's amazing. I ordered grey crystals which make the chandelier even more special. By the way...the light really works!
Ik spring een gaat in de lucht hier!
Still jumping for joy here!

zaterdag 5 maart 2011

Firescreen and mirror

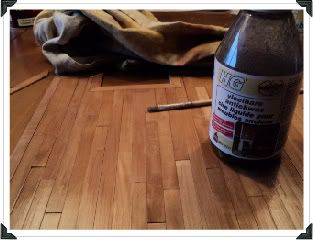
Het is zo leuk om zelf miniaturen te maken dus na het zoeken op het internet en het lezen van boeken had ik genoeg ideetjes om aan de slag te gaan met een haardscherm en een spiegel
Making my own miniatures is so much fun, so after searching on internet and reading my books about dollhouses I had enough ideas to try and make a firescreen and a mirror.
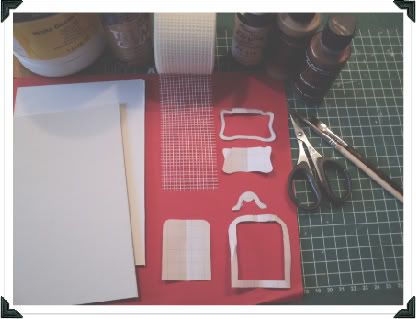
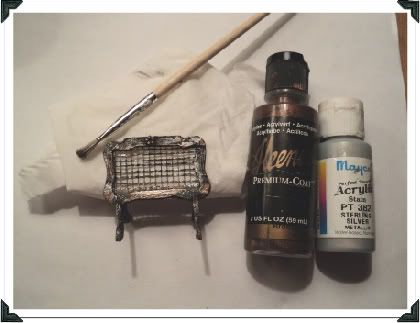
Wat heb ik gebruikt?
Papier met 1 cm ruitjes.
Karton 2 mm dik
Spiegelkarton
Gipsband
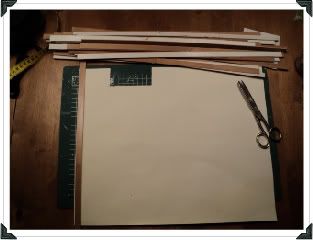
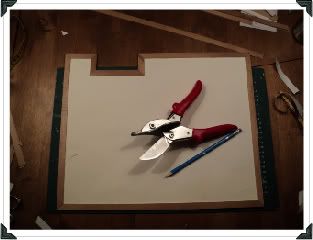
Schaar/lineaal/potlood/penselen
Gesso
Acrylverf in de kleuren zwart/brons/goud/zilver
Scrapboek decoratie randjes
Tacky glue
Kleurloze nagellak

What did I use?
Paper with cm squares
Cardboard 2 mm thick
Mirror cardboard
Plaster tape
Scissors/ruler/pencil/paintbrushes
Gesso
Acryl paint in the colors black/bronze/gold/silver
Scrapbook decoration
Tacky glue
Clear nailpolish

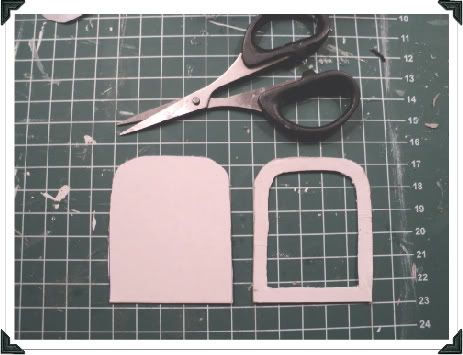
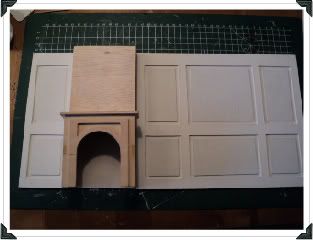
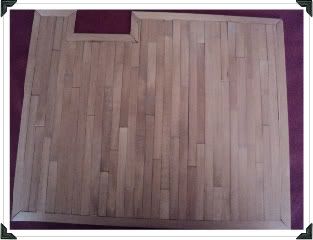
De patroontjes uittekenen op papier. De spiegel is 6 cm hoog en 4 cm breed. Het haardscherm is 3 cm hoog en 5 cm breed. Het haarschermpootje is 1,5 cm hoog en 3 cm breed.
Het handigste vind ik om de helft van het patroon uit te tekenen, het papier dubbel te vouwen en dan te knippen. Zo krijg je twee identieke zijkanten. 
Draw the patterns on paper. The mirror is 6 cm high and 4 cm wide. The screen is 3 cm high and 5 cm wide. The screen leg is 1,5 cm high and 3 cm wide.
I find it easy to draw only half of the pattern then fold the paper in half and cut it out. This way I'm left with identical sides.
Knip het midden gedeelte uit van de spiegel zodat er een kader overblijft van 5 mm breed. Doe hetzelfde voor het haardscherm, hier is de breedte 3 mm.
Cut out the middle part of the mirror so you get a framework 5 mm wide. Do the same with the firescreen but use a width of 3 mm.

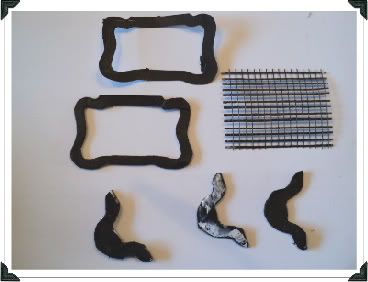
Het haardscherm / The firescreen
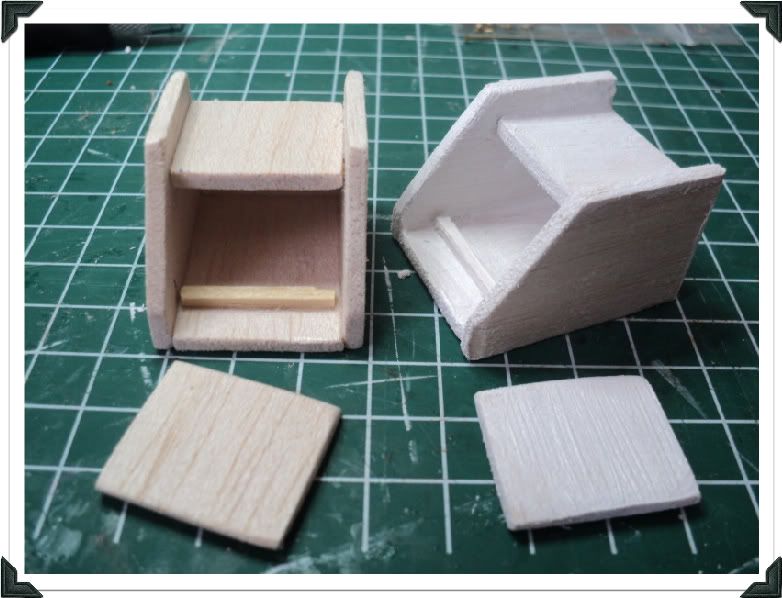
Leg het patroontje van het scherm en het pootje op karton van 2 mm dik en trek het over. Knip uit karton 2 keer het frame en 4 keer de pootjes. Knip een stukje gipsband af wat past in het frame. Schilder alles met een dun laagje Gesso en na drogen met zwart acrylverf.

Put the patterns on 2 mm thick cardboard and trace over the screen 2 times and the leg 4 times. Cut the patterns out. Also cut a piece of plastertape lage enough to fit into the screen. Cover everything in a thin layer of Gesso. After that has dried paint it with black acrylic paint.

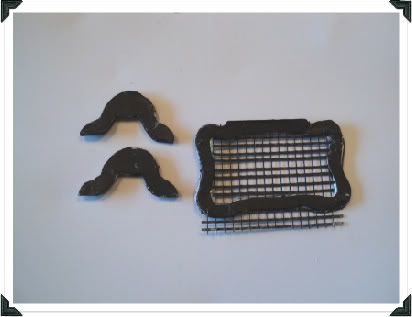
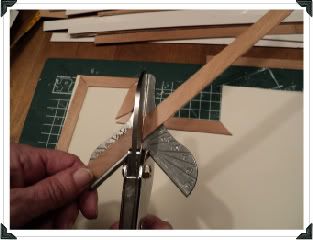
Besmeer twee pootjes met Tacky glue en lijm de twee andere pootjes erboven op.
Plaats het stukje gipsband tussen de twee gedeeltes van het scherm en plak de gedeeltes op elkaar. Knip het teveel aan gipsband netjes af.
Spread some Tacky glue on two of the legs and place the other two on top of it.
Place the piece of plastertape in between the two parts of the screen and glue together. Cut off the excess of plastertape. 

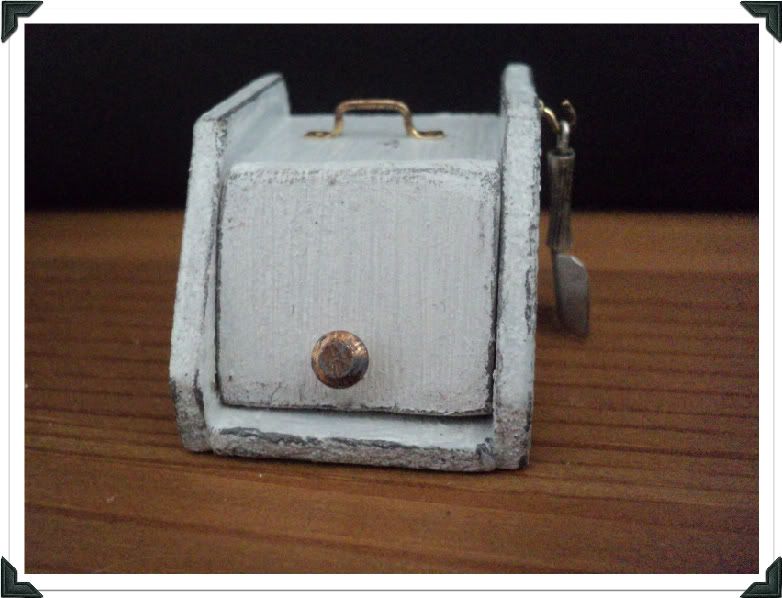
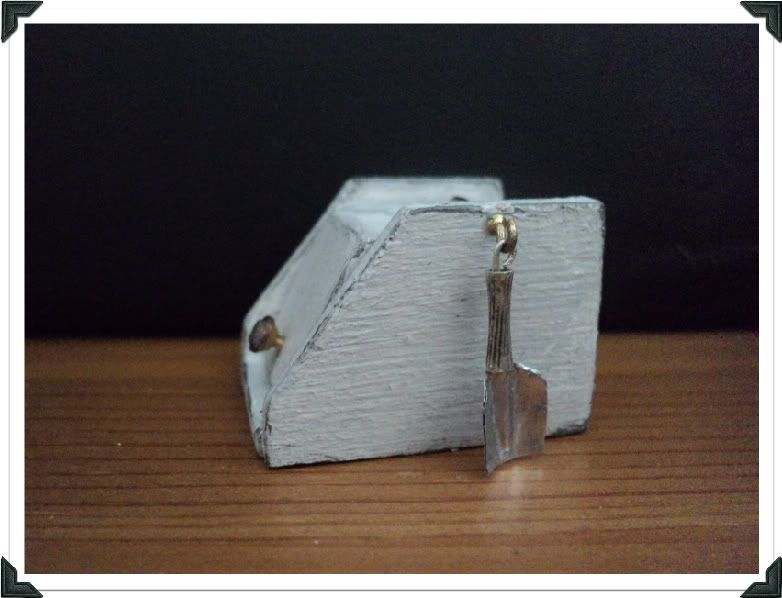
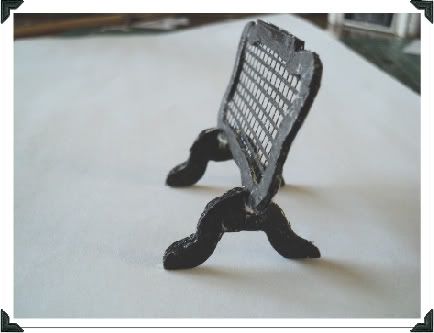
Maak een kleine inkeping aan de bovenkant van het pootje, het scherm moet er in kunnen passen. Lijm het scherm op de pootjes.
Cut a notch at the top of the legs, the screen should be able to fit into it. Glue the screen on the legs.

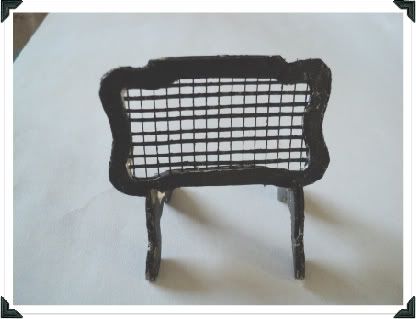
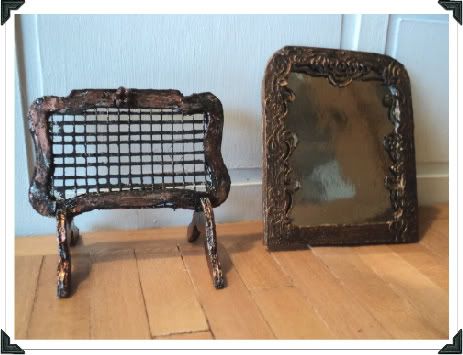
Als laatste het haardscherm met acrylverf in brons/zilver/goud versieren om een oud en gebruikt uiterlijk te geven.
Decorate the screen with bronze/silver and gold paint to get an old and used look.
Om het haarscherm stevigheid te geven heb ik het afgelakt met twee laagjes kleurloze nagellak.
To make the firescreen more firm I've used two coats of clear nailpolish.


De spiegel / The mirror
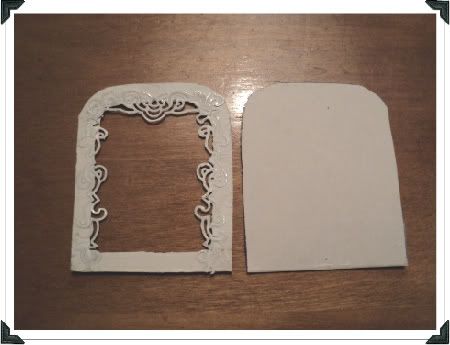
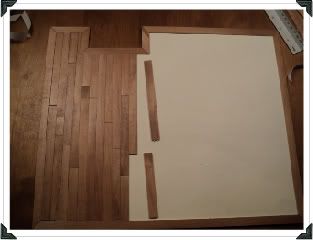
Trek het patroon over op 2 mm karton en knip twee maal uit, een achterkant en een voorkant waaruit het middengedeelte geknipt is.
Trace the pattern on 2 mm cardboard and cut out a backside and a front piece with a cutout middle part
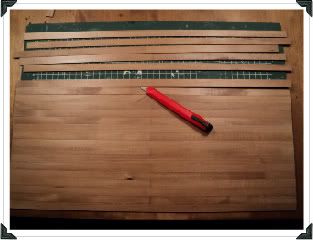
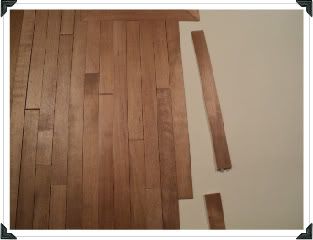
Versier de voorkant met decoratie plakrandjes, deze worden vaak gebruikt bij scrapbooking.
Decorate the front side with scrapbook trimmings.
 Daarna bedekken met een laagje Gesso. Als dit droog is verven met zwart/brons en gouden acrylverf.
Cover with a layer of Gesso and after this is dry paint with black/bronze and golden acrylic paint.
Een stuk om maat geknipt spiegelkarton tussen de twee gedeeltes van de spiegel plakken. Het randje van de spiegel bijwerken met verf en de spiegel is klaar!
Place a piece of cut to size mirror cardboard in between the two parts of the mirror and glue together. If needed touch up the edges of the mirror with some paint and the mirror is ready!
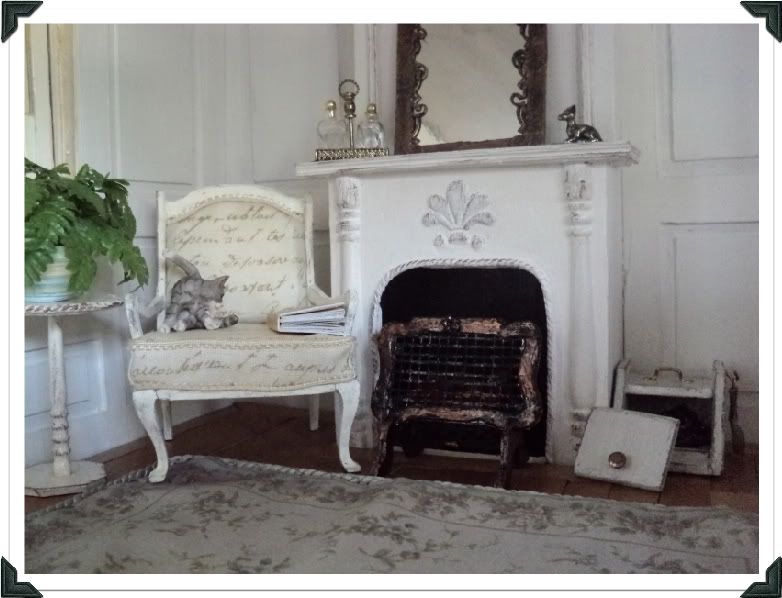
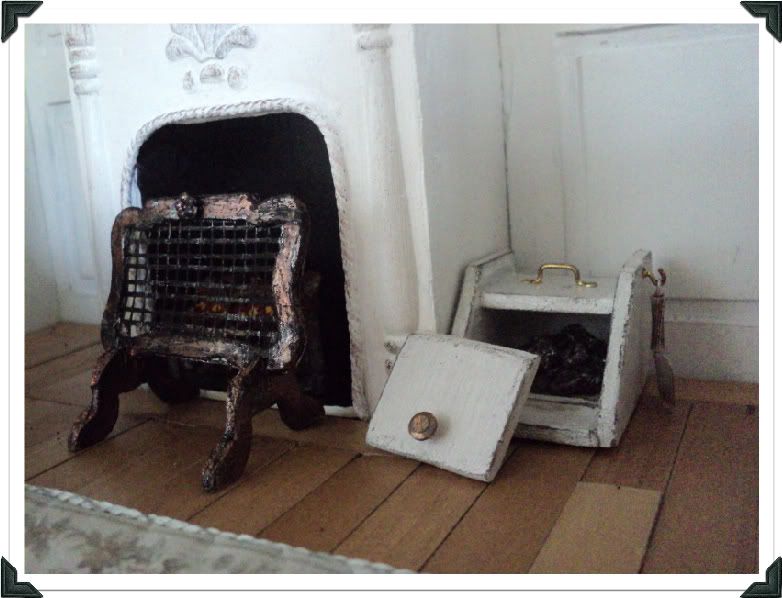
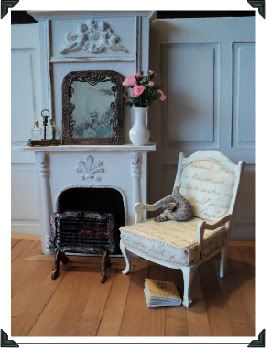
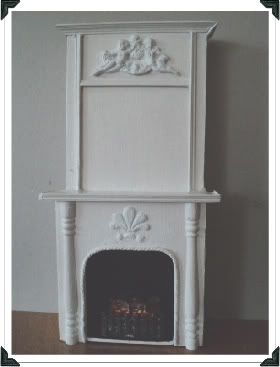
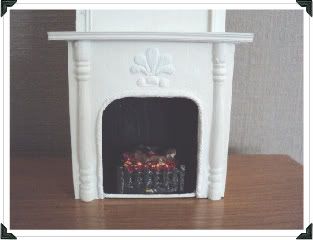
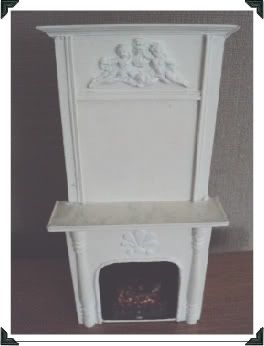
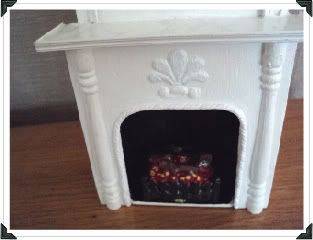
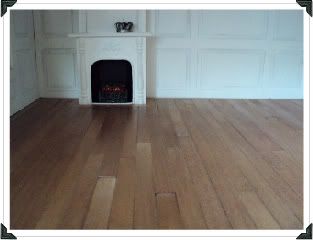
De complete open haard...
The complete open fireplace...
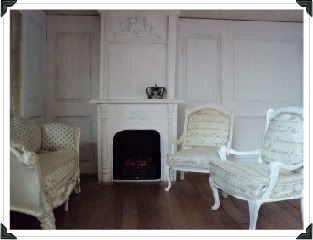
...met haardscherm...
...with firescreen...
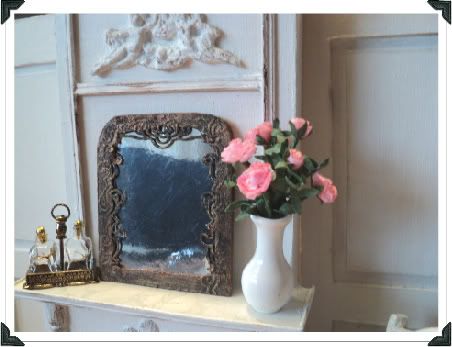
...en spiegel!
...and mirror!

Total make-over

Van de buurvrouw had ik een open haard gekregen wat hoorde bij het Del Prado poppenhuis bouwpakket. Jammer dat ik er geen foto van gemaakt heb, dit is de enige die ik kon vinden waar het oorspronkelijke model op staat.
My neighbor gave me an open fire place that belonged to a Del Prado dollhouse kit. To bad I forgot to make a picture of it, this is the only one I found where you can see the original.
De open haard is versierd met halve pilaren, karton, touw, sierlatjes, uitgeknipte figuurtjes uit behang en een gekocht ornamentje van engeltjes. Daarna heb ik een laag Gesso erover heen gesmeerd. Op de foto's van de eerder gemaakte sofa is deze techniek te zien. De schoorsteenmantel is beplakt met plakplastic met een marmeren patroon.
The open fire place is decorated with pilars that I cut in half, cardboard, rope, decorative strips, cut out figures from wallpaper and a bought ornament with angels. After that I covered everything with Gesso. You can see this technic if you take a glance at the pictures of the earlier made sofa. I covered the mantelpiece with adhesive plastic with a marmble pattern.
Pilars, rope and cut out figures from wallpaper
Angels in top and marble mantelpiece
In het volgende bericht leg ik uit hoe ik het haardscherm en de spiegel heb gemaakt. Blijf kijken! :o)
The next post will be about making the fireplace screen and the mirror. Don't go away! :o)

vrijdag 4 maart 2011

Turbo speed

Een vloer leggen in één dag! In het echte leven zou me dat nooit lukken, maar in de miniatuurwereld wel, zalig toch? Ik heb van 'The Wonham Collection' een vloerplaat gekocht met echt dun hout met een plakgedeelte op de achterkant (WSF1). Een prachtige houten vloer was precies wat de woonkamer nodig had.
Als eerste heb ik de vloer opgemeten en uit dun karton geknipt. Daarna de afzonderlijke latjes van de vloerplaat losgesneden.
Laying a floor in just one day is something I'll never be able to do in the real world, but on miniature scale I can do miracles :) 
I've purchased a wood strip flooring at The Wonham collection (see link above). 
I started off with cutting out a template of the floor out of thin cardboard after which I cut loose the individual wooden strips.
De vloer opmeten en uit karton snijden. Measuring the floor and cutting out of cardboard
De latjes los snijden. Seperating the wooden strips.


Daarna op het karton eerst de contouren geplakt. De latjes zijn in vestek gezaagd.
The next step was pasting the contours of the cardboad with bevel cut wooden strips.
Het opmeten van de randen. Measuring the sides.
In verstek knippen/zagen. Cutting and sawing.
De randen zijn klaar. The finished contours.
Toen ik daarmee klaar was het middenvlak opvullen met latjes. Ik zorgde ervoor dat de naden verspringen ten opzichte van elkaar zodat je een vloer krijgt de natuurgetrouw aandoet.
After finishing the contours I filled in the space with wooden strips making sure the seams are not aligned equally to get a more natural looking effect.
Toen de hele vloer gelegd was heb ik er vloeibare vloerwas opgesmeerd en uitgewreven. Dit om alle naadjes een houtkleur te geven.
After finishing the floor I covered it with liquid floor wax to give all the seams a wood color.
Finishing touches,..it even smells great now :)

 Daarna het eindresultaat bewonderen.
I'm pleased :)

Hoe staat het in de woonkamer?
How does it look?
A lit fireplace, a cup of coffee and a good book.